How to publish Webpages with Github
How to Publish Webpages with GitHub
In this article, you'll learn how to publish a webpage to the world. There are many different ways it can be done, but this time we'll use GitHub, which is free and easy to use.
What You Need to Know
- Basic knowledge of HTML & CSS.
Note:
- Although we'll be using GitHub, previous knowledge of git is not required.
- All the screenshots used in this article were taken on Windows, but this tutorial will also work on Mac also.
1. Steps to Publish a Webpage
Before we start working on it, let's take a look at the steps to publish a webpage on GitHub.
First, let's select the webpage we want to publish.
Once you setup the webpage, upload the HTML and/or CSS files and images to GitHub. If you haven't made a GitHub account yet, you will need to make one first.
Finally, by simply adjusting some file settings on GitHub, you'll be able to publish the webpage for free!
It may sound difficult to publish your own webpage online, but don't worry, I will show you a simple, step-by-step method.
Let's get started!
2. Making a GitHub Account
If you already have a GitHub account
Log in to GitHub and then you can skip this section and move to the next one (Creating a New Repository).
Log in to GitHub and then you can skip this section and move to the next one (Creating a New Repository).
After creating an account, you should see a page like this:
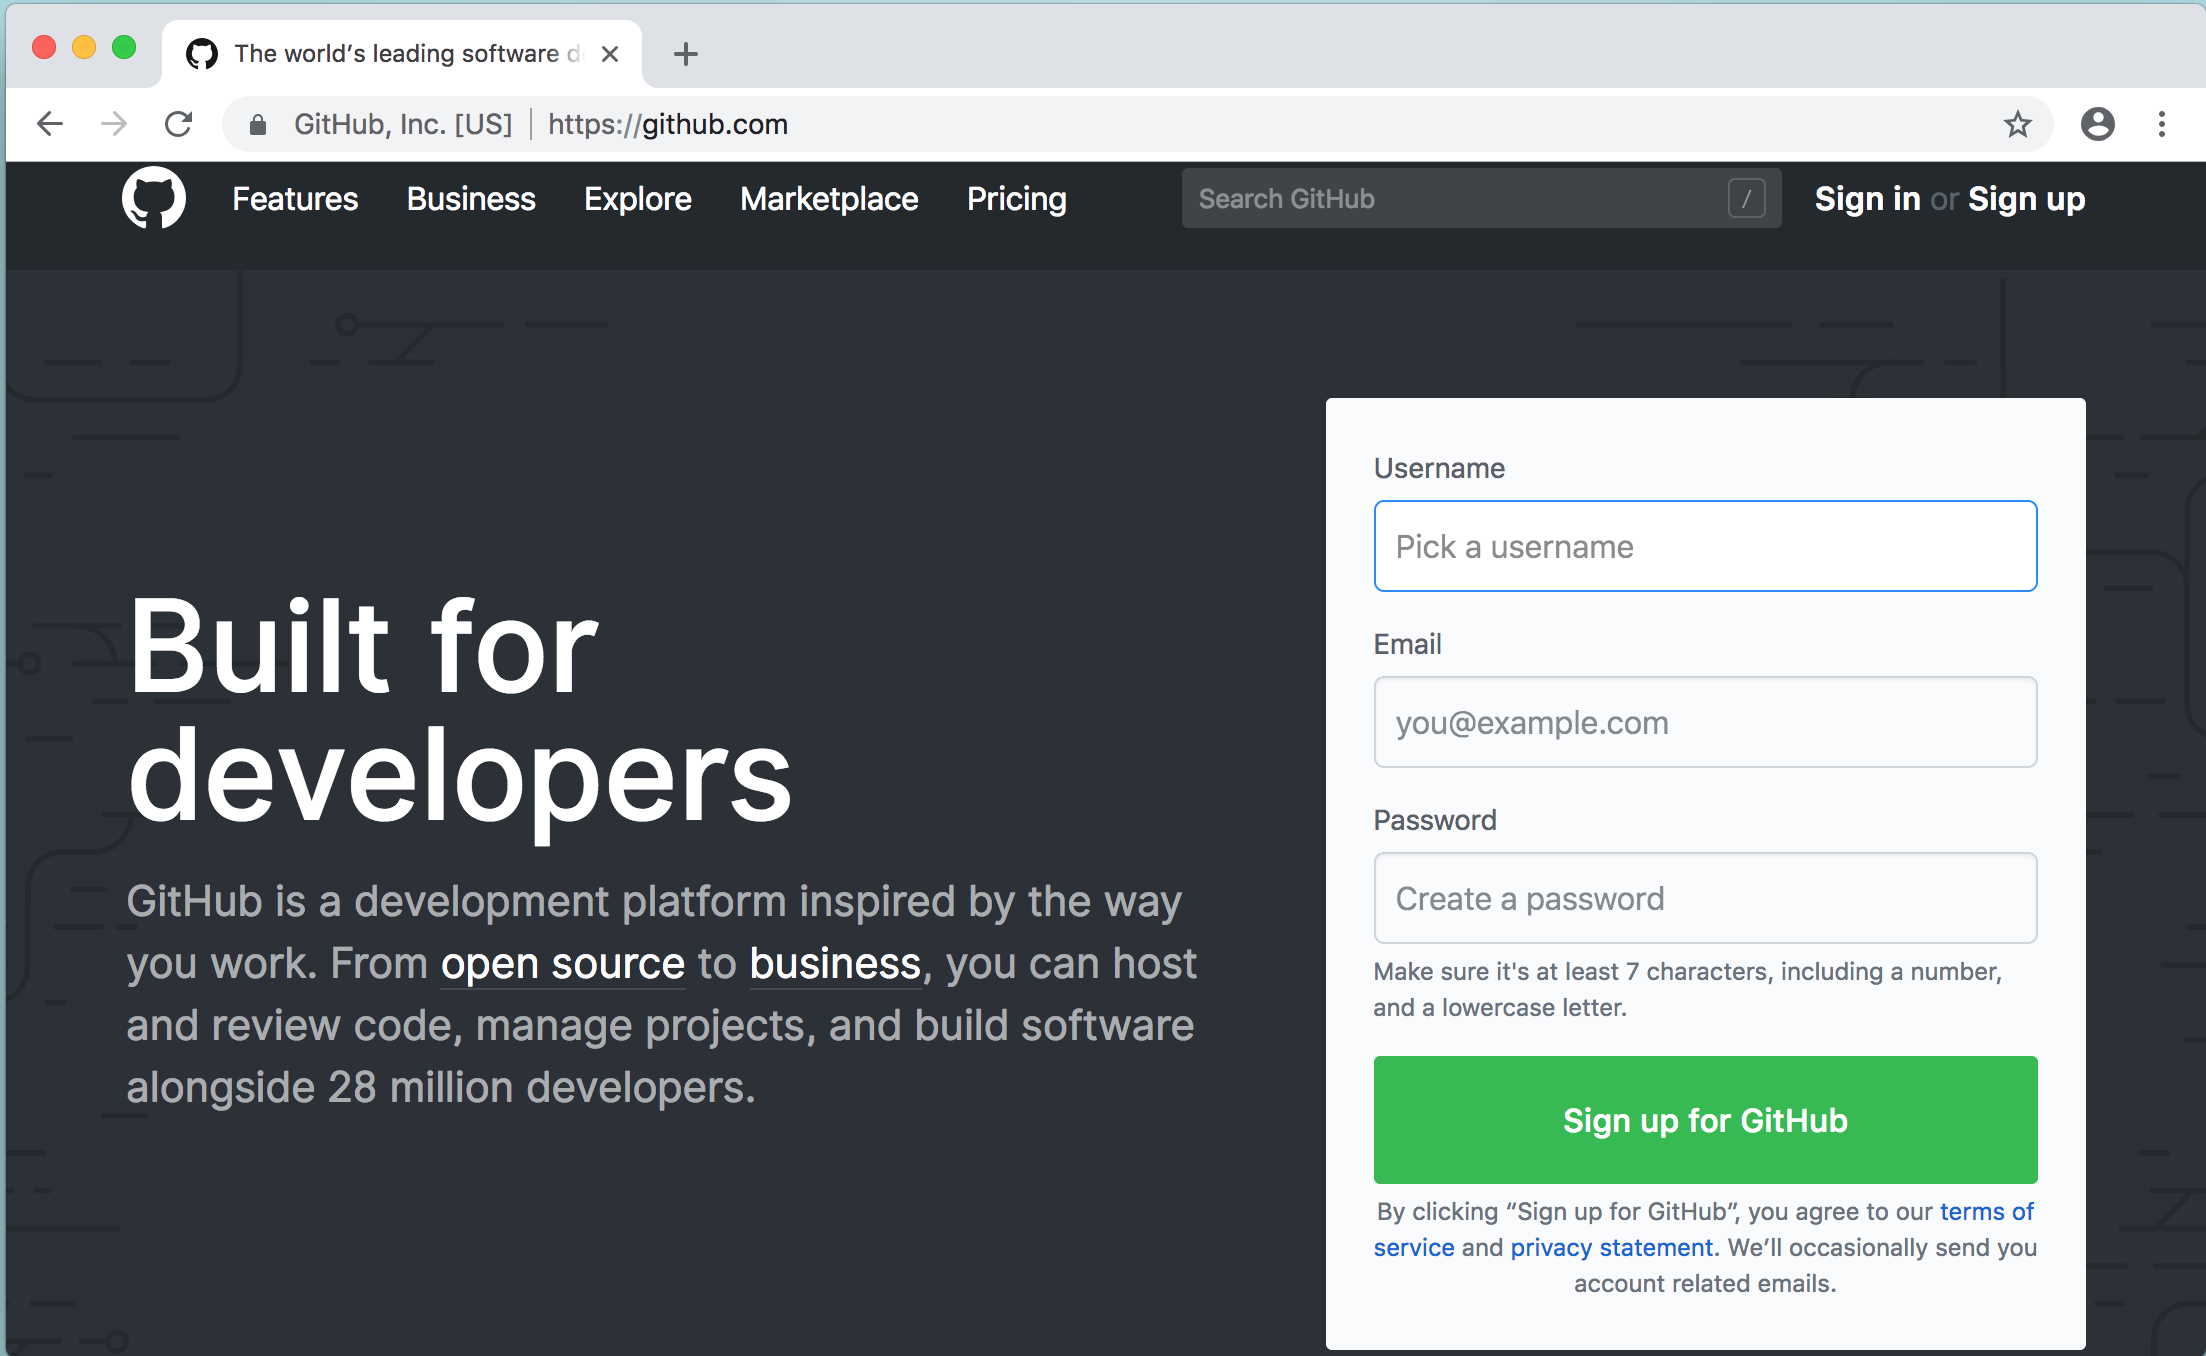 |
| Github account Now enter your username, email, and password in the boxes shown on the right side of the screen and then click the green Sign up for GitHub button. Tip: The username you entered will later be a part of the URL of the website you'll publish later. If there is no problem with the username or password, the following screen will be displayed.  The free plan is enough for this tutorial. Click the green button Continue once you make sure you checked the Free plan like the image. After this, you will see a page for the survey, but you can just click the green button at the very bottom without answering it. You should see a page like an image below. If you do, you've successfully created your GitHub account. Well done.  Check the email you used for this GitHub account to verify your registration. 3. Creating a New RepositoryNext, we'll create a "repository". A repository is like a project folder that helps you manage one webpage or application on GitHub. Like the image below, click the + (plus sign) icon on the upper-right and select New Repository.  Give the repository a name by entering it in the form labeled Repository name in the middle of the page. The repository name can be anything, but the URL of the webpage will depend on this repository name (*see the explanation below). If your account name is set to username.github.io:** The URL for your page will be: https://username.github.io If there's no problem, then let's create a repository with username.github.io (*you can always change the repository name later).  Once you've entered the repository name, click the green Create repository button. You've successfully created a repository. On the screen shown, click the link README like the image below:  This "README.md" is a file you use to write a description of the repository. You don't need to write anything there for now. To save the added file, click the green Commit new file button at the very bottom of the page. Now let's start learning how to upload HTML and CSS files in the next section! 4. Uploading Files
First, let's upload an HTML file called index.html. Click the Create new file button, as shown in the image below:  Enter index.html into the box like the image. This is the file name we'll be using in this tutorial. Please use index.html this time even though you may have a different file name.  Below the box, under Edit new file, copy and paste the entire HTML code. If you haven't created a webpage, copy the code here used it for practice. Once you've made it this far, click the green button at the very end. You've successfully uploaded an HTML file on GitHub. Next, you'll upload a CSS file. The process is the same as the HTML file. This time let's use the file name as the one you've decided inside of index.html (in the example on the image below, the name is stylesheet.css). Uploading an Image Now you've successfully uploaded the code, let's take a look at how to upload an image next. Click Upload files that are next to Create a new file.  Let's drag and drop the images you used inside of the HTML or CSS codes in the middle of the screen shown. You can also upload by clicking choose your files.  If you don't have an image to upload, you can download this sample image and upload it for practice. Once you've successfully uploaded the images, you can save the change by clicking the green button Commit changes. From the screen below, you can check all the files uploaded.  You can check the content of each file by clicking the file name to make sure that everything has been uploaded correctly. 5. Publishing your WebpageLet's publish a webpage with the files you uploaded. First, click the Settings tab on the top right of the screen.  |
You'll find GitHub Pages if you keep scrolling down the page.
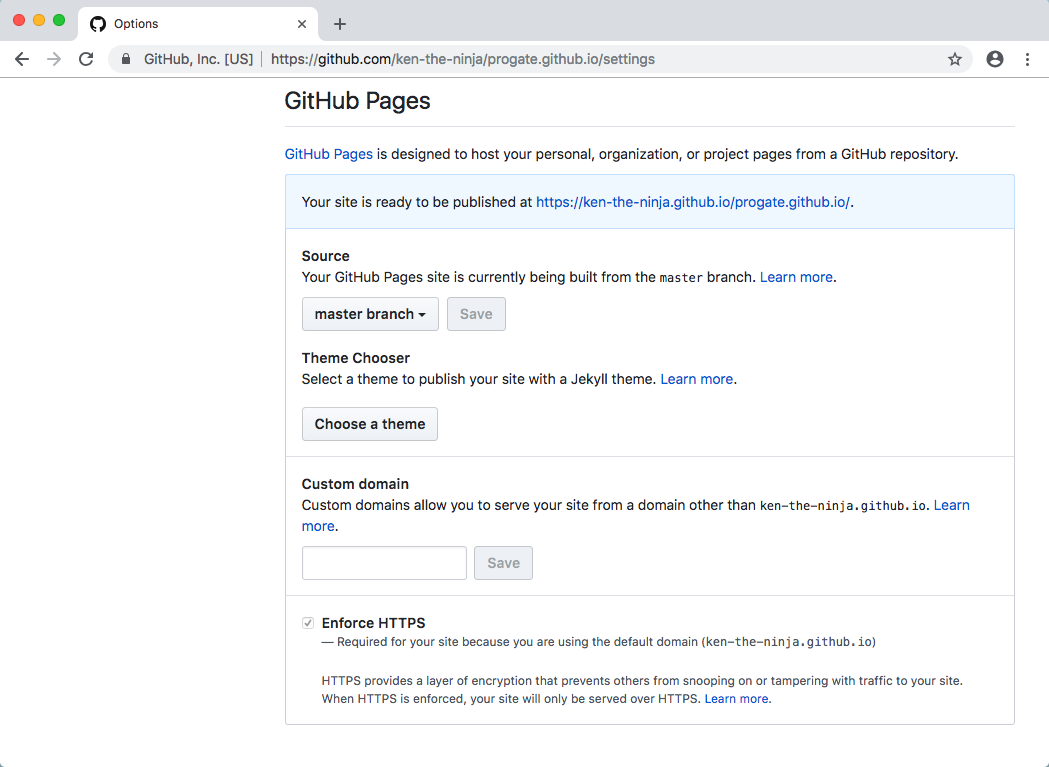
If it says "Your site is published at ..." where the green background is, the webpage is already published with the URL shown here.
If not, Source is probably set as None, so change it to the master branch and then click the button Save to display the URL.
This is the end of the procedure to publish your webpage on the internet. Now anybody can access the webpage you made with the URL!
*If nothing is shown when accessing the URL, there is a possibility that the display page is being processed. It may take a while, so try coming back and loading the page later.
6. Updating Published Pages
Lastly, let's learn how to update the webpage you published. This GitHub page updates not only the code in the file, but it automatically updates the published webpage as well (it may take a few minutes for the changes to take effect).
This time you'll update index.html for practice.
Click the tab Code on the top left of the screen and then click index.html inside of the page shown.
Click the tab Code on the top left of the screen and then click index.html inside of the page shown.
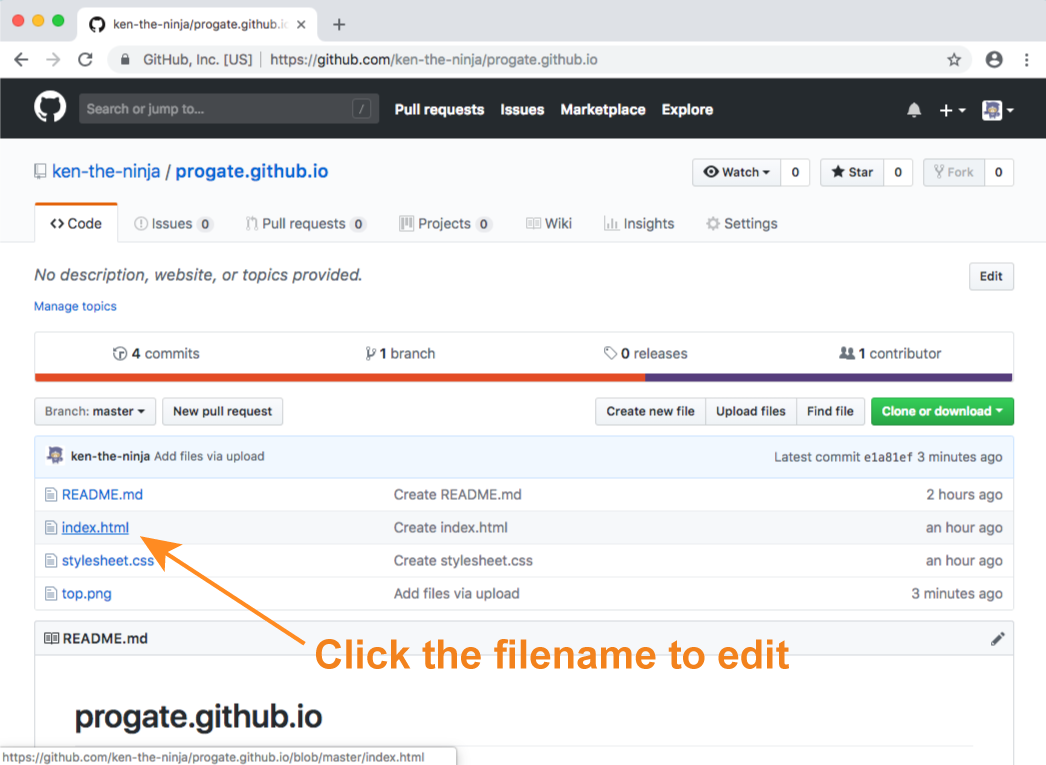
You'll be able to check the contents of the file. On the same screen, click the pencil icon shown on the top right.
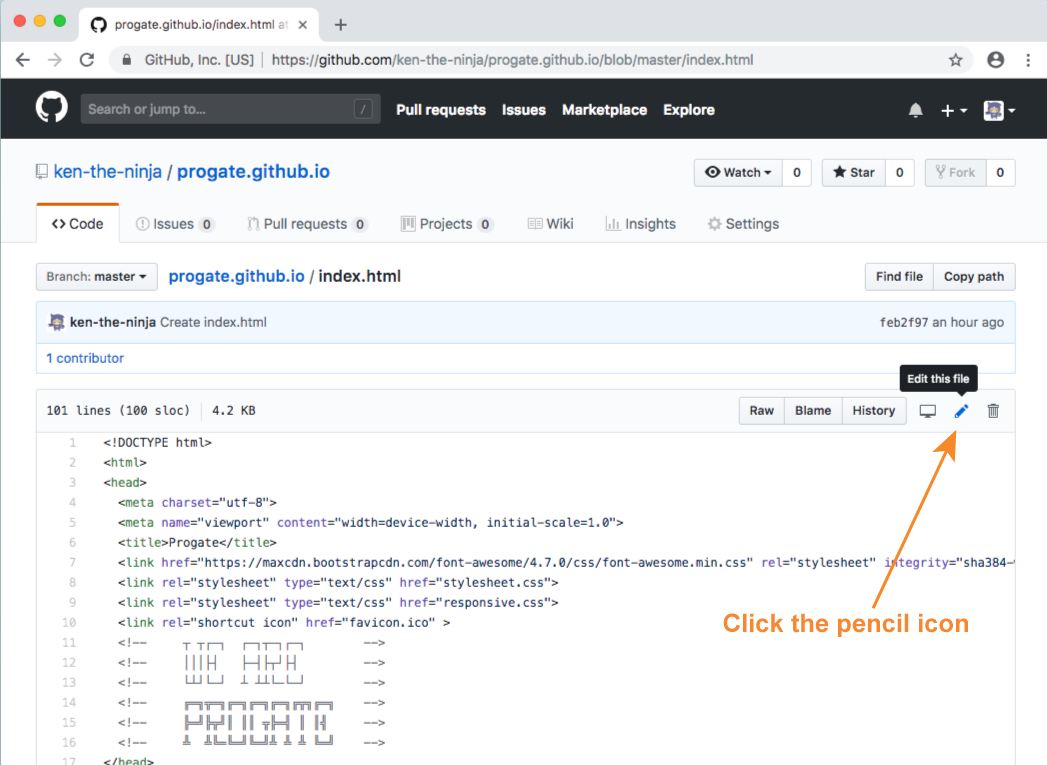
On the screen shown, you can edit the code of index.html.
Once you're done editing, save the changes by clicking the green button at the very end Commit changes.
You can also delete the file by clicking the trash can icon that is next to the pencil icon.


Comments
Post a Comment